I finally finished this fixture a few weeks ago.
The chandelier was in our dining room twelve years ago. It was moved to the kitchen eat-in area after construction until I found the right fixture for that space. Finally it was moved into "the blue room" which was my study and which recently became Emily's room once the girls decided they needed their own separate rooms.
It blended in but was not perfect. I knew I wanted a different light fixture in this room but did not want to buy just anything and there was no rush. Also, this had a low priority. But as Emily's room started to come together - one can read about the wall decal
here - I started to look at the chandelier differently and decided I was not going to put it on Craig's list or ebay but instead transform it.
Shopping at
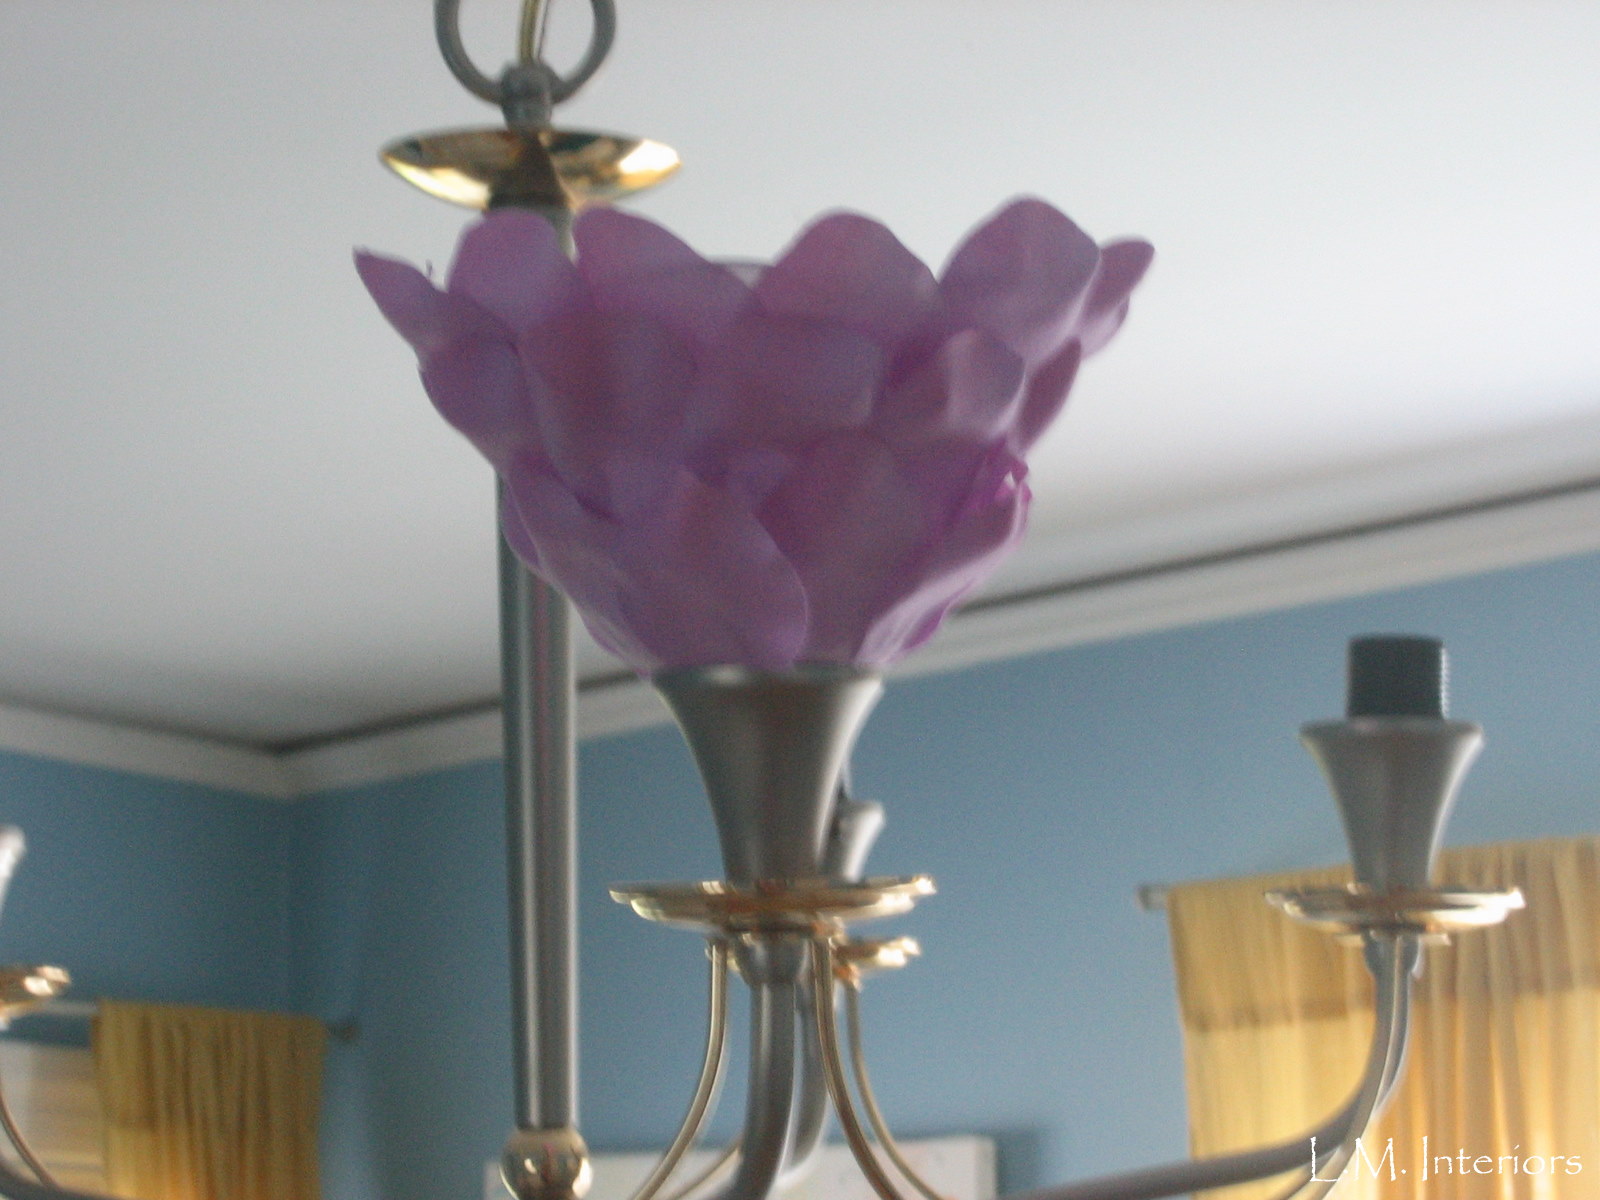
Michaels for something else one day I came across these green petals in the wedding aisle as well as some pink-lilac ones.
I saw the frosted glass sconces as a base around which to create flowers so I removed them. Starting at the narrower end (lower portion) I proceeded to hot-glue the petals with a slight overlap. I did not measure. I glued on 3 layers, ensuring they overlapped and looked like a flower might and ended at the top.
I tested one in the room and liked the look of it.
Love how the color changes with the lights on..more pink.
At night, with the lights on.
I did the lot.
Then I proceeded to glue the green petals in the same way over the base layer so that they looked like leaves.
So far, so good...next I decided to continue with the "leaves" but in order to soften the look of the branches, make it look more natural, I used some wedding tulle to wrap around the fixture first. This would serve as the base on which I glued the other leaves. This was worked on every so often so here is a picture of a break in the project.
I covered the vertical metal piece and chain links with leaves (over the tulle).
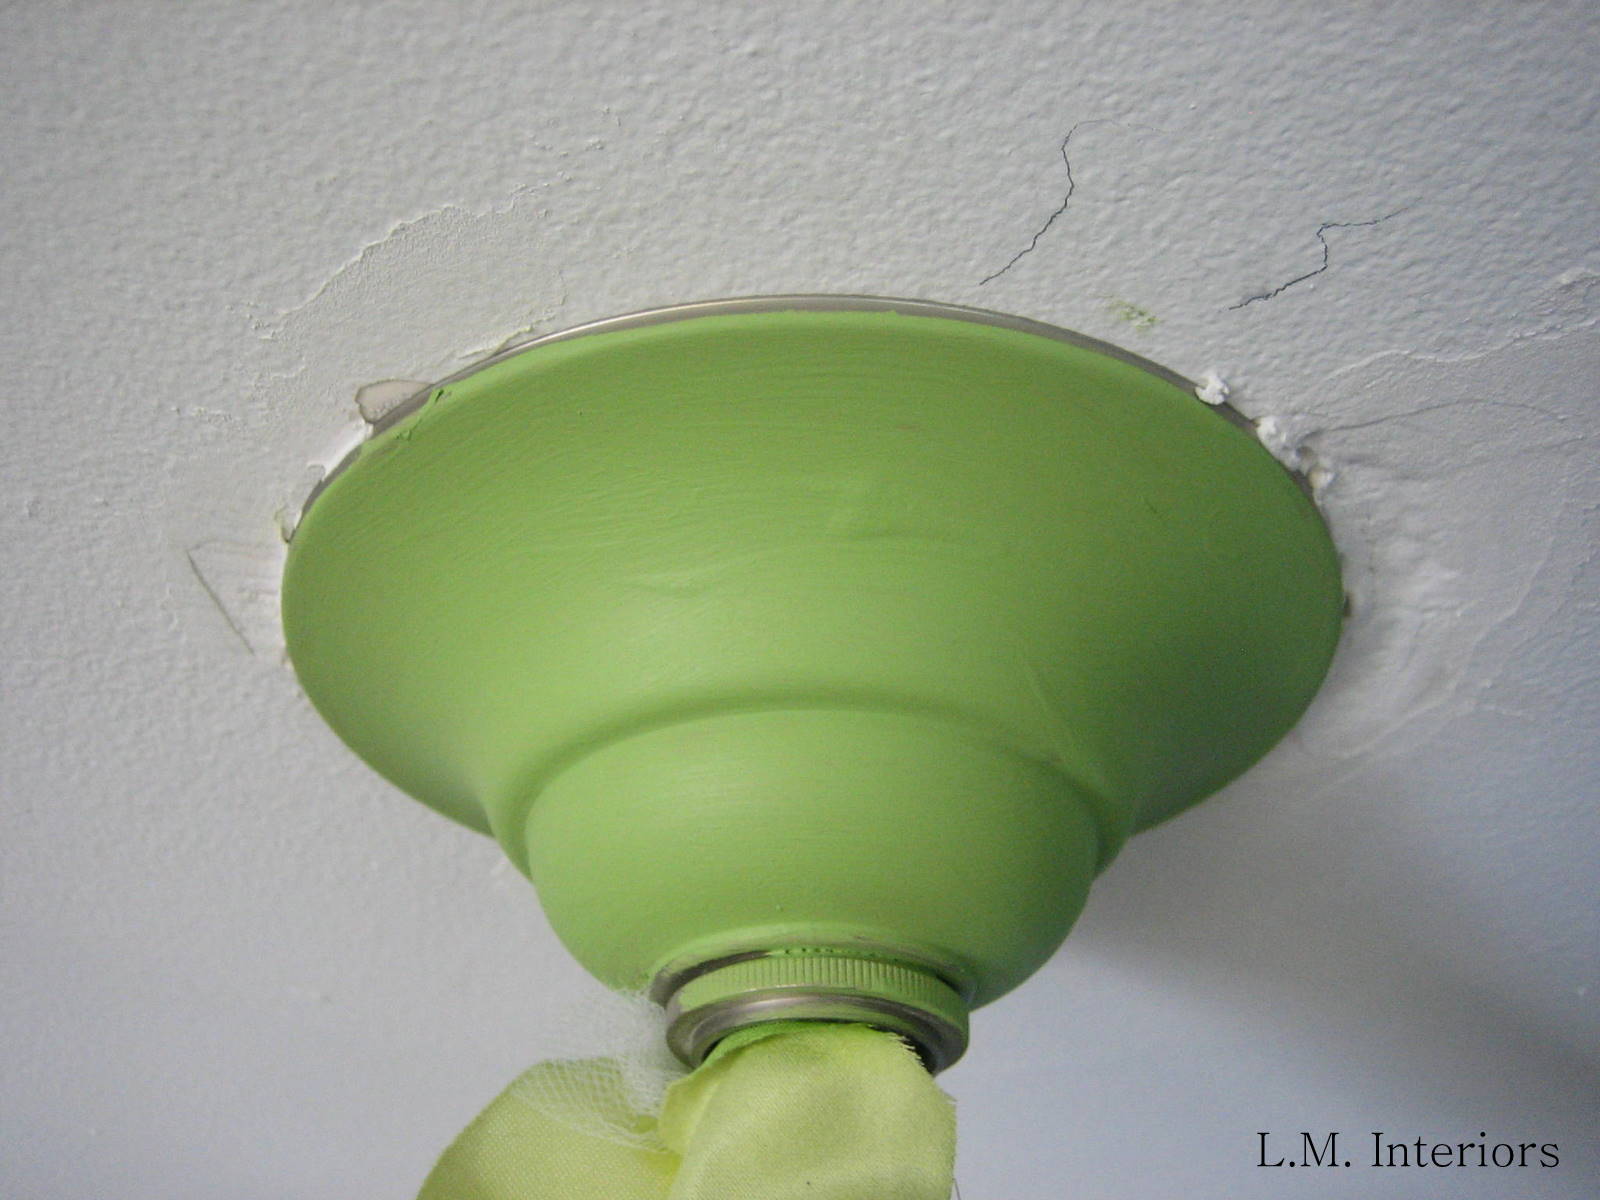
Then came the dilemma with the flower bases...how to change the look..all the metal had to be covered/hidden.
Beautiful but still a work in progress.
I found this
DecoArt Americana acrylic paint in Foliage Green at my local
True Value.
After taping the petals and leaves with Scotch Blue painter's tape I started to paint the metal. I had to use baggie clips (really, these are so very useful) to keep the tulle away from the metal. During this time it was not easy to work around the circular parts and I got paint in my hair and on my clothes.
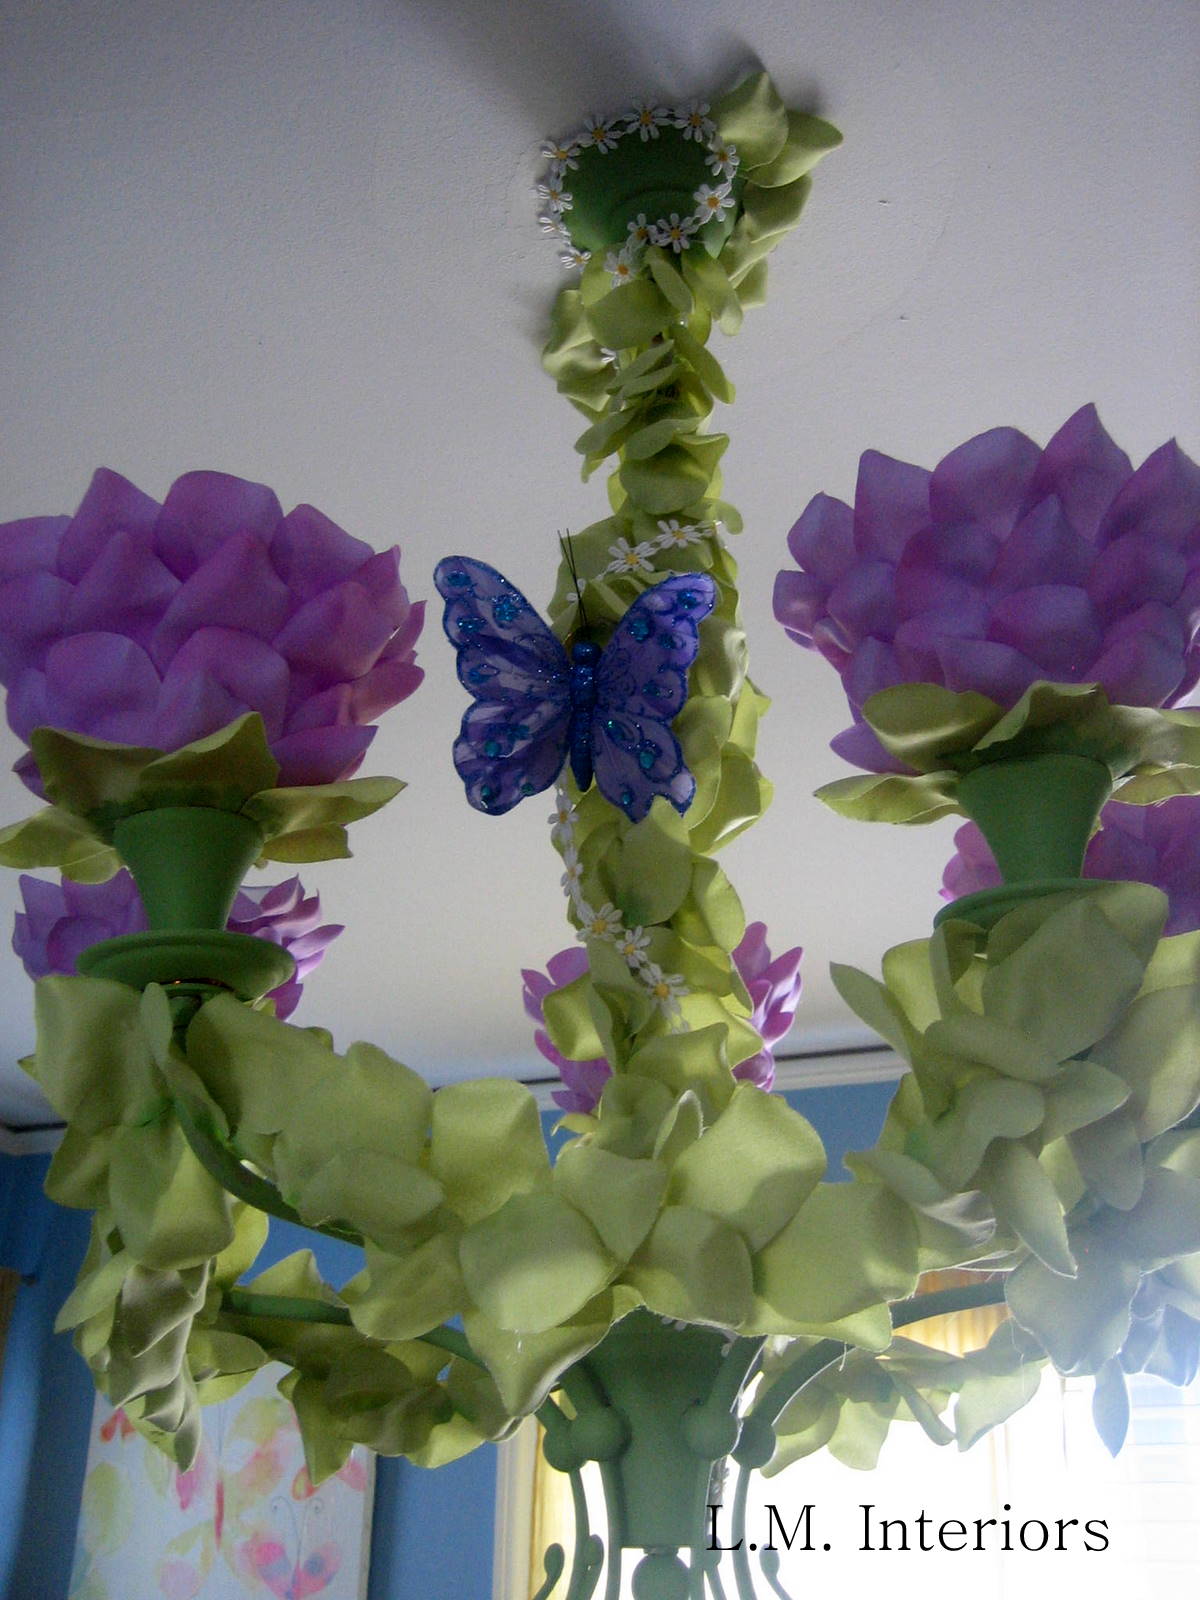
I found this pretty butterfly at
Michaels and decided it would work with the theme of the room. So I clipped onto the fixture so that it was facing the door.
In some spots the painter's tape did not cover the leaves properly so I got some of the green paint on them and so I decided to add some dimension and paint the outer base of the leaves a little.
The ceiling has some imperfections from when the last light fixture was removed. It was never repainted and I wanted to cover the circular marks left on the ceiling.
I "grew" the leaves upward and onto the ceiling.
Then came this other pretty floral trim (daisies) which I thought would lighten up the fixture in a different way, being white. This was bought at
Joann's.
I decided to string it starting from the top.
And lastly, these Martha Stewart crafts floral stickers, again, from
Joann's.
From this..
..to this!
It is a favorite thing!
To recap the list of supplies:
Scotch Blue tape,
Petals (pink and green),
Wedding tulle
Butterfly clip,
Hot glue gun,
Martha Stewart crafts floral stickers.
So, what do you think? Do you like how it looks? It is one-of-a-kind. We love it!
I am linking this up to:
If you require any help with Interior Decorating please click on the tab at the top of my page marked 'Services' or click here for further details.
I would love for you to leave a comment. Thank you for stopping by; please do check back often.
Lisa
Please Note: I have not been compensated in any way for this post. The views and opinions expressed in this post are solely mine and are based on my experience with the companies mentioned and on my purchase of products.